1. Introduction
For some years now the world of IoT (Internet of Things) has experienced a strong increase in the production of BLE (Bluetooth Low Energy) devices. This type of “smart devices” changes the way we interact with the world, but is often controlled through smartphone apps or software whose application protocol is not disclosed.
This guide deals with the activity related to the reverse-engineering of the protocol used in the communication with a BLE device.
It tries to be as general as possible, however it takes as a test/reference device the Eqiva radiator valves produced by the EQ3 company and the related Android application CalorBT . Between 2015 and 2016, Dr. Andrea Trentini contacted the company more than once in order to obtain documentation related to the protocol, but the company did not want to provide details. EQ3 also specified that there is no GNU/Linux software to interact with the valves.
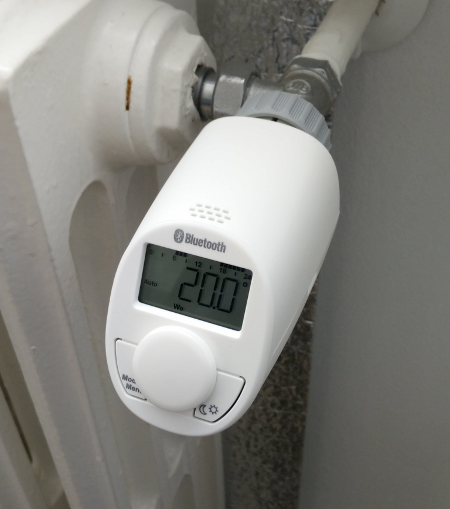
EQ3 Eqiva valve on a radiator
The objectives are:
- to reverse engineer the protocol used to communicate with the BLE device
- to show how to communicate with the device using the BlueZ stack
The result translates into the possibility to integrate these devices into free home automation systems or other external projects. In the specific case of the radiator valves, this guide has led to the creation of a series of shell script functions to manage every “device controlling” aspect.
1.1. What Radiator Valves Are
Radiator valves are thermoregulation devices composed of two parts: a valve and a bulb in contact with the surrounding environment. The bulb contains a fluid with a high expansion coefficient. The set of these two components allows to create a system that, according to a range of values placed on the valve, expands or contracts the fluid. This causes the activation or the interruption of the flow to be managed. It is therefore clear that the application area is that of heating and cooling systems. The use of thermostatic valves on domestic heaters has become fundamental because it allows the reduction of consumption and emissions.
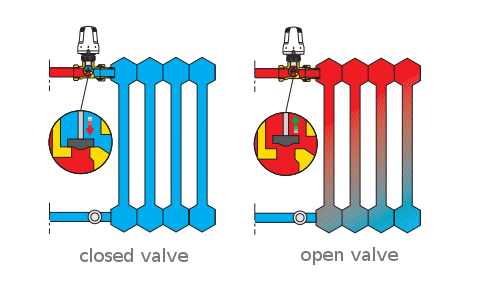
Operating scheme of a classic valve [1]
Electronic versions of these valves have been available for some years now. They are battery powered and equipped with an integrated thermostat replacing the classic fluid. Theese valves can be programmed for the whole week and allow a more accurate selection of the desired temperature. For ease of use, the interaction with these valves usually takes place through a proprietary smartphone application that uses a Bluetooth or Wi-Fi connection for data exchange.
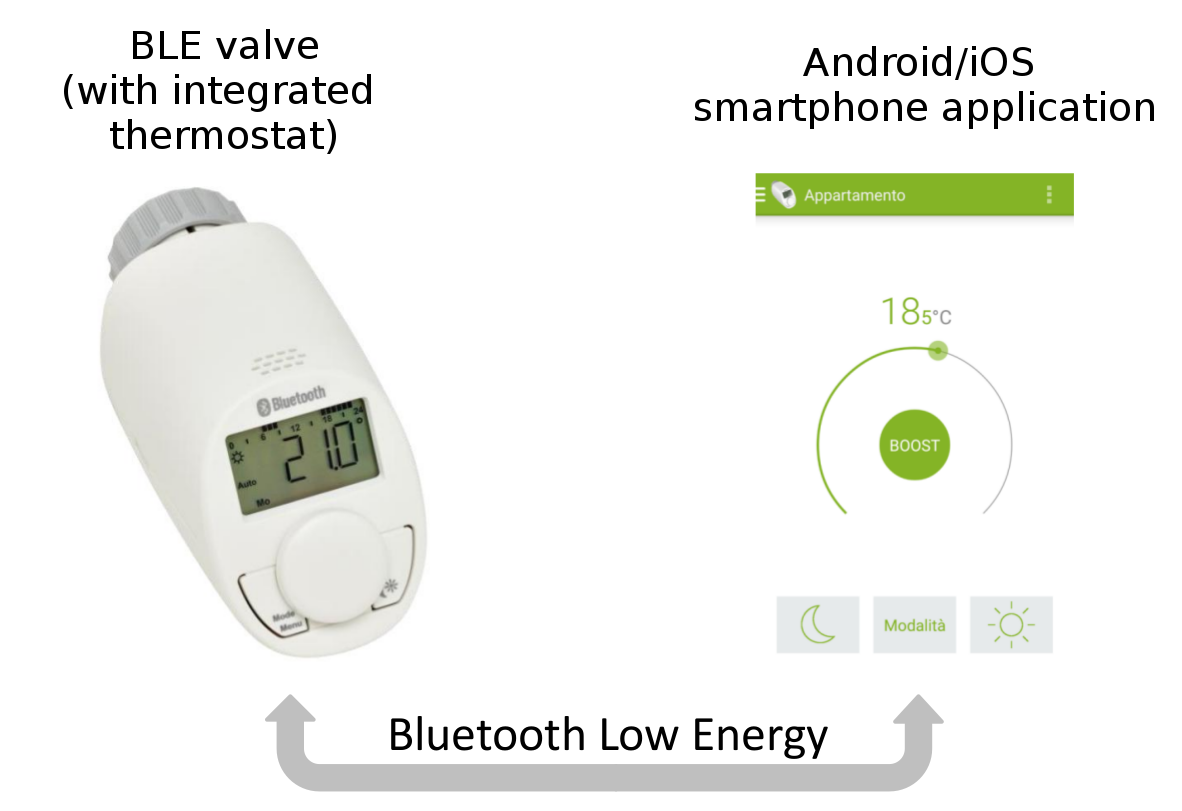
Electronic BLE valve
| [1] | Demshop - Caleffi 200 |
1.2. Setup Without A Radiator
Once mounted on the radiator, the valves must perform an adaptive run phase before they can be used.
During this phase the valve lengthens the external pin until it detects the radiator’s pin and calibrates itself (on the strength of the valve pin).
While this activity takes place, the AdA message is shown on the display and no further operations can be performed.
Note
According to the manual [2], if during the setup phase the valve shows the error messages F2 or F3
the reasons are respectively:
- the valve pin extended to the maximum length without meeting the radiator pin
- the valve pin was blocked before reaching the minimum required distance
While the error is shown, the motor returns to its starting position (indicated by Ins on the display).
To restart the calibration, press the button in the middle of the valve and wait again for the necessary time.
However, it may happen that there isn’t a radiator suitable for initialization or an immediate way to perform this phase. Several times we have done the calibration by inserting a marker in the valve and locking it against a wall to exert the necessary force. It is easy to understand that this is not a very convenient method and often requires more attempts.
Since the valve must recognize that it is in contact with something very constantly resistant, alternative methods can be found. The least expensive solution involves using the adapter supplied with the valves. It is designed to make them usable on various types of radiators and is equipped with a screw to tighten and loosen the grip (see Adapter Details).
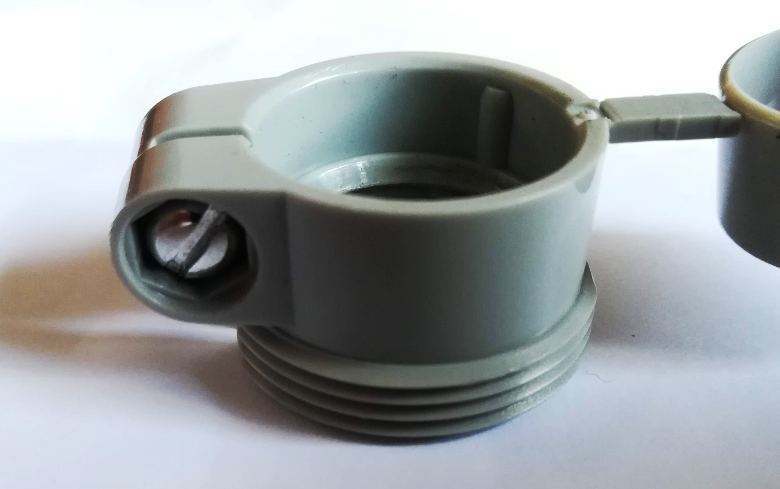
Adapter Details
The second piece we need is a large screw (or a sort of cylinder) of the size needed to fill the adapter. (see the next image as a reference). It is important that when the adapter is tightened the screw makes a lot of grip because the valve’s pin pushes very hard.
The bolt can be found in many hardware stores at low cost (less than 1€), while the adapter will cost you more (between 5€ and 10€). However it is usually included in the valve package.
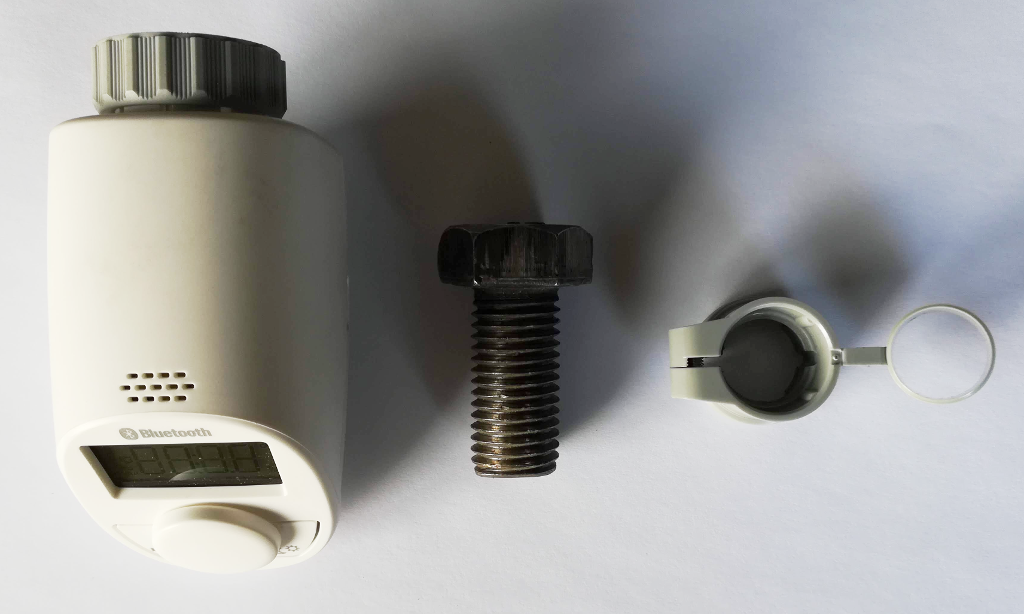
From left to right: the valve, the screw and the adapter
Now it is enough to:
- insert the screw in the adapter so that it sticks out a lot towards the valve
- tighten the small screw around the adapter
- attach the adapter to the valve (see Test device setup example)
- start the setup phase by pressing the big button on the valve
Test device setup example
If during the calibration phase we meet one of the errors mentioned in the previous note, then it’s sufficient to adjust the screw accordingly.
| [2] | Eq3 Eqiva User Manual |